
Chocolate cones are a delightful dessert that pairs the crispiness of a cone with the rich, smooth taste of chocolate. Whether used as an edible container for ice cream or enjoyed on their own, these cones offer a delicious way to satisfy your sweet tooth. Their versatility allows for various customizations, including different chocolate coatings, toppings, and fillings, making them a favorite among dessert lovers.
In this guide, you’ll explore the history of chocolate cones, essential ingredients, and a step-by-step recipe to make them from scratch. Whether you’re an experienced baker or a beginner, this guide will help you create the perfect chocolate cones at home.
History and Origin of Chocolate Cones
The concept of edible cones dates back to the early 20th century, with the invention of the ice cream cone. The most widely accepted story traces the ice cream cone to the 1904 St. Louis World’s Fair, where an ice cream vendor ran out of cups and collaborated with a nearby waffle seller to create a rolled, edible cone.
Over time, chocolate-enhanced cones emerged as a gourmet variation. Some were made by dipping traditional waffle or sugar cones in melted chocolate, while others incorporated cocoa directly into the batter. As a result, chocolate cones became a staple in ice cream parlors, bakeries, and dessert shops worldwide. Today, they are enjoyed in a variety of forms, from simple chocolate-dipped cones to fully infused chocolate shells.
Ingredients Needed
Essential Ingredients for Making Chocolate Cones
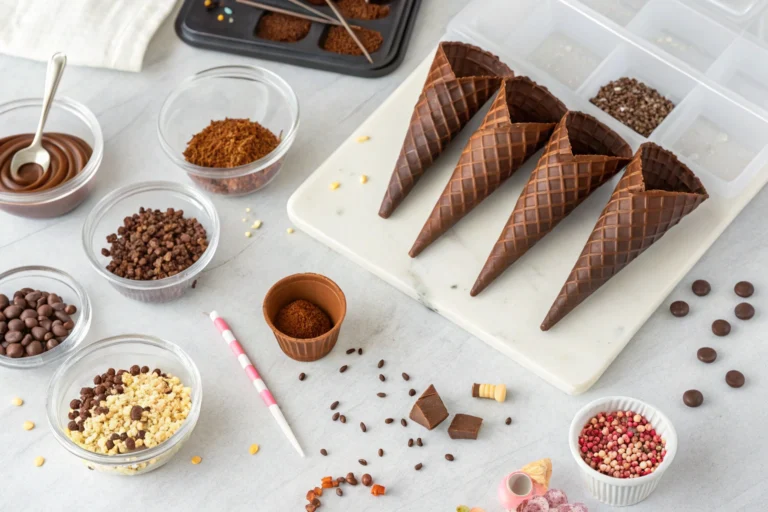
To create rich and flavorful chocolate cones at home, you’ll need a few key ingredients:
- All-purpose flour – Provides structure to the cone batter.
- Cocoa powder – Enhances the chocolate flavor.
- Sugar – Adds sweetness and helps achieve a crisp texture.
- Butter or oil – Contributes to both crunch and richness.
- Eggs – Helps bind the ingredients together for a stable batter.
- Milk or water – Ensures the right consistency.
- Vanilla extract (optional) – Enhances the depth of flavor.
- Melted chocolate – Used for coating or mixed into the batter for extra chocolate richness.
Best Types of Chocolate for Cones
Choosing high-quality chocolate significantly impacts the final result. The best options include:
- Dark Chocolate (70% cocoa or higher) – Provides an intense, slightly bitter flavor that pairs well with both sweet and nutty fillings.
- Milk Chocolate – Offers a creamy and sweet taste, making it a popular choice for dessert lovers.
- White Chocolate – A smooth, buttery option that complements fruity toppings or drizzles.
- Chocolate with Add-ins – Varieties that contain nuts, caramel, or crisped rice add texture and extra flavor.
For optimal results, couverture chocolate or baking chocolate works best, as they melt smoothly and create an even coating.
Step-by-Step Recipe
Making chocolate cones from scratch is a rewarding process. Follow these detailed steps to achieve crispy, chocolate-infused cones at home.
How to Make Chocolate Cones from Scratch
Ingredients:
- ¾ cup all-purpose flour
- ¼ cup unsweetened cocoa powder
- ½ cup granulated sugar
- ¼ tsp salt
- 2 tbsp melted butter
- 2 large eggs
- ½ cup milk or water
- 1 tsp vanilla extract
- ½ cup melted dark or milk chocolate (for coating)
Instructions:
- Prepare the Batter
- In a mixing bowl, whisk together flour, cocoa powder, sugar, and salt.
- In a separate bowl, beat the eggs, then add melted butter, milk, and vanilla extract.
- Gradually combine the wet and dry ingredients, stirring until a smooth batter forms.
- Cook the Cones
- Heat a non-stick pan or waffle cone maker over medium heat.
- Pour about ¼ cup of batter onto the pan, spreading it into a thin circle similar to a crepe.
- Cook for 1–2 minutes per side, or until the edges start to crisp.
- Shape the Cones
- While still warm, carefully roll each cooked circle into a cone shape using a mold or by hand.
- Hold the shape for a few seconds to allow the cone to set. Let them cool completely before proceeding.
- Dip in Chocolate
- Melt chocolate using a double boiler or microwave, stirring frequently to ensure a smooth consistency.
- Dip the top edges or fully coat the cones in melted chocolate.
- Place them on a parchment-lined tray and allow the chocolate to harden.
- Serve and Enjoy
- Fill the cones with ice cream, whipped cream, or fruit, then serve immediately.
Variations of Chocolate Cones
Chocolate cones come in many delicious varieties, each offering unique flavors and textures. Whether you prefer rich dark chocolate, smooth white chocolate, or crunchy nut-filled options, there’s a chocolate cone to suit every taste.
Dark Chocolate Cones
For those who love bold and intense flavors, dark chocolate cones are a fantastic choice. These cones use high-cocoa-content chocolate (70% or higher), delivering a deep, slightly bitter taste that pairs perfectly with creamy ice cream or fruity fillings.
Best pairings for dark chocolate cones:
- Vanilla or coffee ice cream
- Mixed berries (strawberries, raspberries, or blueberries)
- Salted caramel or peanut butter filling
White Chocolate Cones
White chocolate cones offer a sweet, buttery flavor with a hint of vanilla. Made from cocoa butter instead of cocoa solids, these cones provide a smooth and creamy experience.
Perfect pairings for white chocolate cones:
- Strawberry or coconut ice cream
- Fresh mango slices
- Drizzled caramel or honey toppings
Nut-Filled Chocolate Cones
For added texture and richness, nut-filled chocolate cones combine crushed almonds, hazelnuts, or pistachios with melted chocolate. The result is a crunchy, flavorful cone that complements both classic and gourmet ice cream flavors.
Best nuts to use in chocolate cones:
- Almonds – Provide a mild crunch and a slightly sweet taste.
- Hazelnuts – Pair well with chocolate, creating a Nutella-like flavor.
- Pistachios – Offer a hint of saltiness that enhances sweetness.
Pairing suggestions:
- Chocolate or praline ice cream
- Creamy hazelnut spread or Nutella filling
- A sprinkle of sea salt for contrast
Serving and Presentation Ideas
A beautifully presented chocolate cone elevates the dining experience. Whether serving at home or for an event, creative plating and pairings can make your chocolate cones even more appealing.
Best Ways to Present Chocolate Cones
- Drizzle & Garnish – Before serving, drizzle the cones with extra melted chocolate or caramel for an elegant touch.
- Sprinkle with Extras – Add crushed nuts, coconut flakes, or edible glitter for a decorative finish.
- Use a Cone Stand – Serving cones upright in a stylish stand prevents mess and enhances presentation.
- Wrap in Decorative Paper – A stylish wrapper or ribbon around the cone adds a gourmet touch.
Pairing Ideas for Chocolate Cones
Pairing chocolate cones with the right flavors enhances the overall experience. Consider these combinations:
- With Ice Cream:
- Dark chocolate cones with vanilla bean or espresso ice cream
- White chocolate cones with fruity sorbet or caramel ice cream
- Nut-filled chocolate cones with chocolate or praline ice cream
- With Beverages:
- Dark chocolate cones with hot coffee or red wine
- White chocolate cones with chai tea or iced vanilla latte
- Nut-filled chocolate cones with hazelnut milk or almond milk lattes
- With Fresh Fruits:
- Strawberries and bananas pair well with milk chocolate cones
- Blueberries and raspberries complement dark chocolate cones
- Mango and coconut work beautifully with white chocolate cones
Health Benefits of Chocolate
While chocolate is often considered a treat, it also offers several nutritional benefits when consumed in moderation, particularly dark chocolate with high cocoa content.
Nutritional Value of Chocolate
Chocolate contains several essential nutrients, including:
- Antioxidants – Dark chocolate is rich in flavonoids, which help protect cells from damage.
- Magnesium – Supports muscle function and heart health.
- Iron – Aids in red blood cell production.
- Fiber – Promotes digestive health, especially in dark chocolate varieties.
How Dark Chocolate Benefits Health
- Improves Heart Health – Studies suggest that dark chocolate can help lower blood pressure and improve circulation.
- Boosts Mood – Chocolate contains serotonin and theobromine, which enhance mood and reduce stress.
- Supports Brain Function – The flavonoids in dark chocolate may improve cognitive function and memory.
- Regulates Blood Sugar – Dark chocolate with high cocoa content has a lower glycemic index, making it a better option for those monitoring sugar intake.
For the best health benefits, choose dark chocolate with at least 70% cocoa and avoid varieties high in added sugar.
Final Thoughts
Chocolate cones are a versatile and indulgent treat, offering endless variations and creative serving possibilities. Whether you prefer dark, white, or nut-filled chocolate cones, pairing them with the right ingredients enhances their flavor. Additionally, dark chocolate provides several health benefits, making it a delicious yet nutritious choice when consumed mindfully.
Next time you enjoy a chocolate cone, try experimenting with different toppings, fillings, and presentations to create a truly unforgettable dessert experience!
Common Mistakes to Avoid
Even though making chocolate cones is relatively simple, a few common mistakes can affect their texture and appearance. By understanding these pitfalls, you can create perfectly crisp, delicious chocolate cones every time.
Issues in Tempering Chocolate
Tempering is essential for achieving a smooth, glossy finish on chocolate cones. However, mistakes during this process can cause chocolate to turn dull, streaky, or too brittle.
❌ Overheating the Chocolate – Chocolate should be melted slowly at low heat. If it overheats, it can become grainy and lose its temper.
✅ Use a Double Boiler – Melt chocolate over gentle heat rather than directly on a stovetop.
❌ Skipping Seeding – If chocolate is not tempered correctly, it may not set properly.
✅ Add Finely Chopped Chocolate – After melting, stir in small pieces of solid chocolate to help the temperature cool evenly.
❌ Cooling Too Quickly – Sudden temperature changes can cause blooming (white streaks on the chocolate).
✅ Cool at Room Temperature – Avoid refrigerating tempered chocolate too soon.
Preventing Cones from Breaking
Thin or improperly shaped chocolate cones can crack easily. Follow these tips to avoid breakage:
- Use the Right Thickness – Spread the batter evenly when making homemade cones. If the batter is too thin, the cones may become fragile.
- Let Cones Set Properly – Allow enough time for the cones to cool completely before handling or dipping in chocolate.
- Strengthen with Chocolate Coating – A light layer of melted chocolate on the inside can help reinforce the cone’s structure.
Chocolate Cone Storage
Proper storage helps maintain the crispness and flavor of homemade chocolate cones. Follow these guidelines for short- and long-term storage.
How to Store Homemade Chocolate Cones
For cones to stay fresh and crunchy:
- Store in an Airtight Container – Exposure to air makes cones stale or soft.
- Keep at Room Temperature – If humidity is low, cones can last up to a week in a cool, dry place.
- Use Parchment Paper Between Layers – This prevents cones from sticking together.
DIY Chocolate Cone Decorations
Decorating chocolate cones can make them look even more appealing, whether for personal enjoyment, parties, or gifts. Here are some fun and creative ways to enhance their presentation.
How to Decorate Chocolate Cones Beautifully
- Drizzle with Melted Chocolate – Use a contrasting type of chocolate (white on dark, dark on milk) for a stylish touch.
- Dip in Nuts or Cookie Crumbs – Roll the edges in crushed almonds, hazelnuts, or Oreos for extra crunch.
- Use Colorful Sprinkles – Adds a playful and festive appearance.
- Pipe in Whipped Cream or Mousse – Turn the cones into elegant dessert cups.
Using Edible Glitter and Sprinkles
For a professional or festive touch, edible decorations make chocolate cones even more special.
Edible Glitter – Lightly dust cones with gold, silver, or colorful edible glitter for a luxury look.
Rainbow Sprinkles – Perfect for kids’ treats or fun-themed desserts.
Crushed Candy Pieces – Peppermint, toffee, or caramel shards add both texture and flavor.
Chocolate Cone Business Ideas
If you love making chocolate cones, turning your passion into a small business can be a great opportunity. With the right marketing and packaging strategies, you can sell homemade chocolate cones successfully.
Selling Homemade Chocolate Cones
There are multiple ways to sell chocolate cones:
- Local Farmers’ Markets – Great for reaching food lovers in your community.
- Online Stores – Platforms like Etsy or a personal website can help expand your reach.
- Cafés and Ice Cream Shops – Partnering with local businesses allows you to distribute cones to a larger audience.
- Special Events & Catering – Weddings, birthdays, and corporate events often look for customized desserts.
Marketing and Packaging Tips
To attract customers and stand out in the market, consider these strategies:
📦 Attractive Packaging – Use decorative wrapping, branded stickers, and custom boxes for a professional look.
📸 Social Media Marketing – Promote on Instagram, Pinterest, and TikTok with high-quality photos and videos.
🎯 Target the Right Audience – Offer gift boxes, gourmet sets, or personalized cones to attract premium buyers.
💬 Engage Customers – Share behind-the-scenes videos, DIY tutorials, and recipe ideas to build a loyal following.
Final Thoughts
Chocolate cones are not only a delicious treat but also a versatile dessert that can be customized in countless ways. By mastering tempering techniques, proper storage, and creative decorating methods, you can make high-quality cones at home. If you’re considering selling them, an effective business strategy and attractive presentation can help turn your passion into profit.
Next time you make chocolate cones, experiment with different decorations and flavors to create a unique, irresistible treat!