
The smell of apples and cinnamon baking in the oven… it’s pure nostalgia, isn’t it? I remember my grandmother, Nana Elsie, always had a pie or crumble cooling on her windowsill. Those warm, comforting scents would fill the whole house. She’d often make Apple Bars – a slightly less fussy version of her classic apple pie. They were her go-to for potlucks and family gatherings, and honestly, they were always the first to disappear. So, I’ve taken her cherished recipe, tweaked it slightly, and I’m thrilled to share it with you. These Apple Bars are the perfect blend of buttery shortbread crust, juicy, spiced apples, and a sweet, crumbly topping. Let’s get baking!
Why You’ll Love These Apple Bars
Forget complicated pies. These bars are wonderfully simple to make. You don’t need to fuss with crimping pie crusts or worrying about soggy bottoms! They’re quicker, easier, and just as delicious. Here’s why these Apple Bars will become a regular in your baking rotation:
- Seriously Easy: The recipe is straightforward and beginner-friendly.
- Bursting with Flavor: The combination of cinnamon, nutmeg, and tart apples is a classic for a reason.
- Perfect Texture: The buttery crust offers a delightful crispness, contrasting beautifully with the tender apples and crumbly topping.
- Portable & Shareable: Easy to cut into squares, they’re ideal for picnics, lunchboxes, or sharing with friends.
- Crowd-Pleaser: Seriously, who doesn’t love apple pie flavors?
The Ingredient List – Let’s Gather What We Need
Here’s what you’ll need to create these incredibly delicious Apple Bars. I’ve included both metric and imperial measurements for your convenience.
For the Crust:
- 1 ½ cups (192g) all-purpose flour
- ½ cup (113g) unsalted butter, chilled and cubed
- ¼ cup (50g) granulated sugar
- ¼ teaspoon salt
- 3-5 tablespoons ice water
For the Apple Filling:
- 6 medium apples (Granny Smith, Honeycrisp, or a mix work well – about 3 lbs total), peeled, cored, and sliced ¼ inch thick
- ¼ cup (50g) granulated sugar
- 2 tablespoons all-purpose flour
- 1 teaspoon ground cinnamon
- ½ teaspoon ground nutmeg
- 1 tablespoon lemon juice
For the Crumb Topping:
- ½ cup (60g) all-purpose flour
- ¼ cup (57g) packed light brown sugar
- ¼ cup (57g) unsalted butter, chilled and cubed
- ½ teaspoon ground cinnamon
Step-by-Step Cooking Instructions: Baking Your Apple Bars
Alright, let’s roll up our sleeves and get baking! Don’t worry, it’s easier than it looks.
1. Making the Crust:
- In a large bowl, whisk together the flour, sugar, and salt.
- Cut in the chilled butter using a pastry blender or your fingertips until the mixture resembles coarse crumbs. Don’t overwork it – keeping the butter cold is key for a flaky crust.
- Gradually add the ice water, one tablespoon at a time, mixing lightly after each addition. Stop when the dough just comes together.
- Form the dough into a disc. Wrap it in plastic wrap and chill in the refrigerator for at least 30 minutes.
2. Preparing the Apple Filling:
- While the dough chills, prepare the apple filling. In a large bowl, combine the sliced apples, granulated sugar, flour, cinnamon, nutmeg, and lemon juice. Toss gently to coat.
3. Assembling and Baking the Bars:
- Preheat your oven to 375°F (190°C).
- Lightly grease a 9×13 inch (23x33cm) baking pan.
- On a lightly floured surface, roll out the chilled dough into a rectangle slightly larger than the baking pan.
- Carefully transfer the dough to the prepared pan and press it into the bottom and slightly up the sides.
- Pour the apple filling evenly over the crust.
- Making the Crumb Topping: In a small bowl, combine the flour, brown sugar, and cinnamon for the crumb topping. Cut in the chilled butter until the mixture forms coarse crumbs.
- Sprinkle the crumb topping evenly over the apple filling.
- Bake for 35-45 minutes, or until the crust is golden brown and the apple filling is bubbly. If the topping starts to brown too quickly, tent the pan with aluminum foil.
- Let the bars cool completely in the pan before cutting into squares. This is REALLY important – they’ll be much easier to cut when they’re cool.
Tips, Variations, and Serving Suggestions: Elevating Your Apple Bars
Here’s how to make these Apple Bars even more amazing!
- Apple Choice: Don’t be afraid to experiment with different apple varieties. A mix of sweet and tart apples provides the best flavor balance.
- Spice it Up: Add a pinch of ground cloves or allspice to the apple filling for extra warmth.
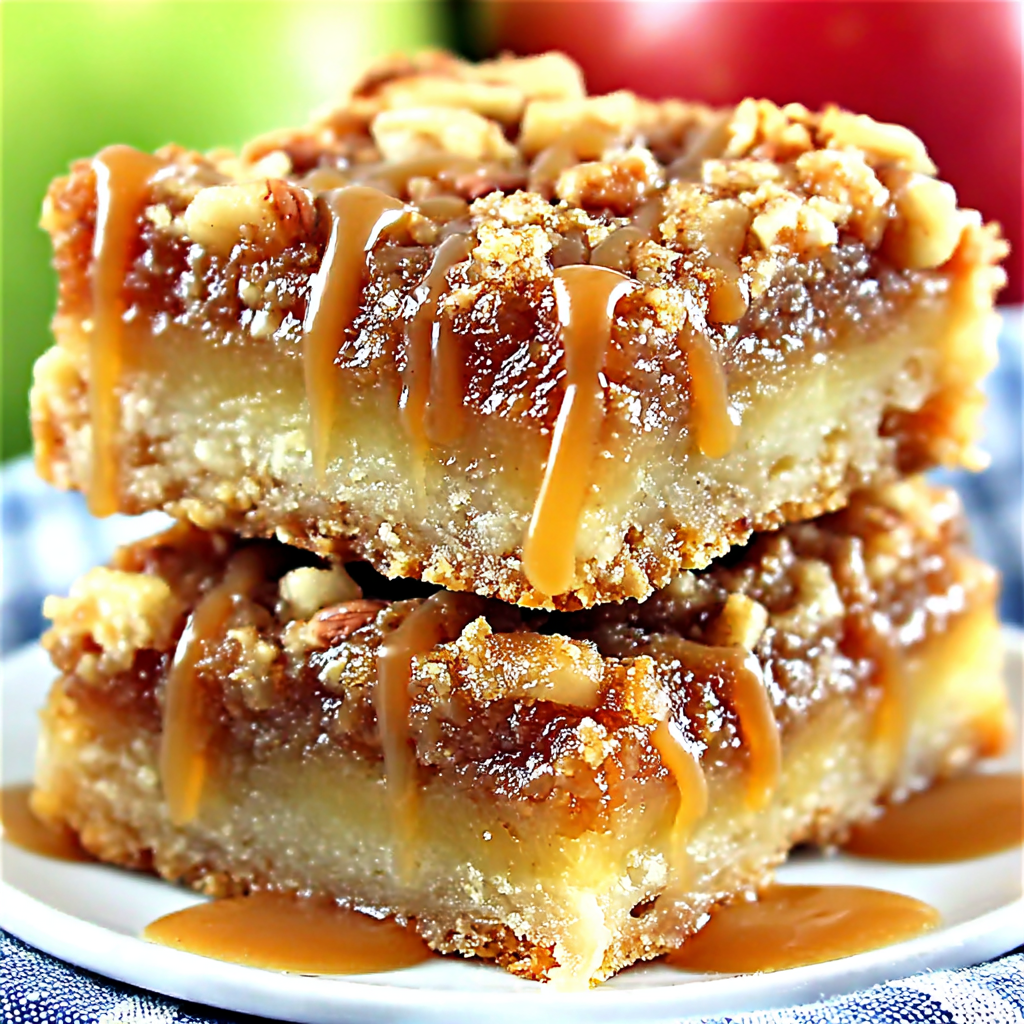
- Nutty Crunch: Stir in ½ cup of chopped walnuts or pecans into the crumb topping for added texture and flavor.
- Caramel Drizzle: Once the bars have cooled, drizzle with a homemade or store-bought caramel sauce. Seriously, decadent!
- Serve Warm or Cold: These bars are delicious either warm (with a scoop of vanilla ice cream, perhaps?) or at room temperature.
- Storage: Store leftover Apple Bars in an airtight container at room temperature for up to 3 days or in the refrigerator for up to 5 days.
(Optional) Nutritional Information (Approximate per bar, based on 12 bars):
- Calories: 320-380
- Fat: 15-20g
- Saturated Fat: 8-10g
- Carbohydrates: 45-55g
- Sugar: 25-35g
- Protein: 3-4g
Note: These values are estimates and can vary based on specific ingredients and portion sizes.
Enjoy the Sweetness!
There you have it! Your very own batch of comforting, delicious Apple Bars. Baking is all about sharing and enjoying the simple things in life. I hope this recipe brings a little bit of Nana Elsie’s warmth and joy to your kitchen. Don’t be intimidated – give it a try! I’m confident you’ll find these apple bars become a cherished family favorite. Happy baking!